[Meet friends by disassembling] Warm air blower cleaning + principle analysis (many pictures, please be careful)
A while ago, my neighbor moved and gave me a Midea heater, saying he didn't want it anymore. But since I had nothing to do, I decided to tinker with it and take it apart to have a look.
Here’s the full picture first. Just by looking at the outside, you can tell how dirty the inside is. No wonder no one wants it anymore!

Rear air inlet

product label

Water level indicator + vent

Smaller power plug

A good helper for disassembling the machine - BOSS cordless drill

Press the air inlet clip on the back of the main unit, remove the plate and the air filter. It is so dirty that I cannot bear to look at it. Just imagine the hot air being blown out like this and I dare not breathe!


Remove the four screws at the back


Separate the front and rear shells

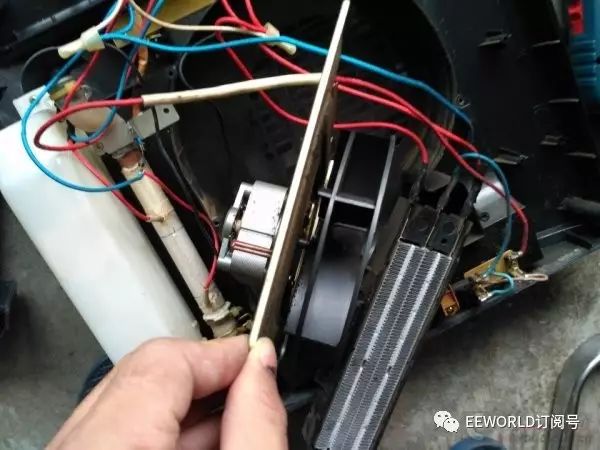
Reveal the inside


Humidification and power indicator light board + power switch + heating selection switch

Power adapter board

Fan Motor

PTC ceramic heating element

There is a RY130 thermal fuse inside

Remove the long screws at both ends of the PTC ceramic heating body cover and the screws at the temperature fuse.


The PTC ceramic heating element cover is opened to reveal the PTC ceramic heating element


PTC ceramic heating element with a maximum power of 1500W, divided into two sections

PTC ceramic heating element corresponding to weak gear

Another section of PTC ceramic heating element

PTC ceramic heating element corresponding to strong gear

There is also a lot of dust on the PTC ceramic heating element.

At the same time, the temperature fuse at the PTC ceramic heating element is also exposed.

Remove the cannula

Close-up of RY130 fuse. The specific parameters are model RY130, 250V, 10A, 130℃


Start disassembling the humidifier

Remove the screws on the humidifier (3 screws, and two screws on both ends of the humidifier container)
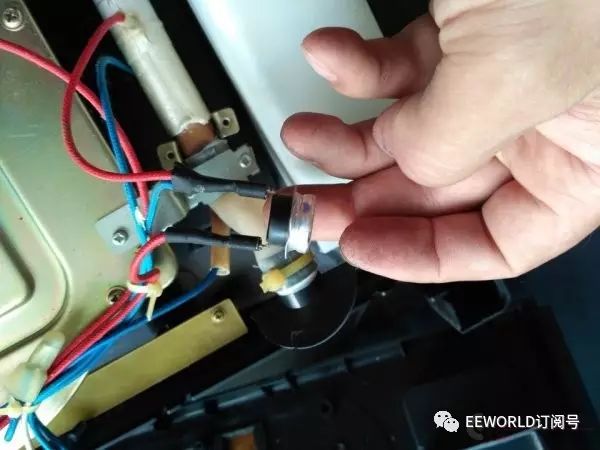
There is also a short heating wire on the humidifier tube. A temperature control switch and a temperature fuse are clamped on the tube. First remove the temperature control switch.

Close-up of the temperature control switch, model is KSD301, parameters are 250V, 10A, 120℃

Then remove the thermal fuse

It is a bit burnt black. The heat generated by the fuse at the PTC ceramic heating element is much greater. A close-up of the RY150 fuse. The specific parameters are model RY150, 250V, 10A, 150℃


Remove the heating intensity switch


Be careful not to lose the knob cap. When putting it back, put the knob cap in first and then install the switch.
Next, I started to disassemble the turbo fan. It was all dusty.


First, remove the card on the motor shaft from the fan blade side and pull out the fan blade.

Remove the three screws fixing the motor from the other side.

Finally, I removed the power cord clip. The screws here are quite difficult to use, so I had to use a U-shaped screwdriver. Fortunately, I had all the tools.

Remove the air outlet cover

Below is a diagram of all the internal components


The next step is to wash the shell accessories and hang them on the balcony.


After drying the accessories, reassemble them in order. This is the complete machine after cleaning and restoration. The power plug is replaced with a Bull one, which can be bent.

Finally, to test the performance, you need to use a power monitor

Turn on the humidification switch first

Only the humidifier is turned on, the power of the whole machine is about 68W, and the humidity is normal

Then turn on the heating and select the weak setting. The power of the whole machine is about 850W, and the heat is average.

Then select the strong level for intensity. The power of the whole machine is about 1500W. It blows out hot air and has high heat, which means the whole machine is functioning normally. It is more environmentally friendly and healthier than using a small sun. You won’t be cold this winter!


Finally, let me introduce the working principle of this heater:
The heater is a desktop structure. The whole machine is mainly composed of front and rear shells, humidification container, low-power heater, PTC ceramic heater, turbine fan, air filter and control panel. Cool air enters from the rear shell, and after filtering and heating, warm air is blown out from the air outlet of the front shell. The whole machine circuit is shown in the figure below. FU1 and FU2 are thermal protectors, S1 is the heater power selection switch, LED1 is the heater power indicator, FTC1 and PTC2 are ceramic heaters, S2 is the humidification switch, ST is the temperature limiter, LED2 is the humidification power indicator, and EH is the humidification heater. Turn S1 to the "low" gear, PTC1 heats the air, and M rotates to send out warm air; turn S2 to the "high" gear, PTC1 and PTC2 heat the air at the same time, and M rotates to send out hot air. When S1 is in the "low" and "high" gears, LED1 is on. PTC1 and PTC2 have temperature self-limiting characteristics, which can keep the temperature constant.
When humidification is needed, first fill the humidification container with water to the "full water" position, close S2, LED2 lights up, EH heats the water, and when water vapor comes out of the humidification hole, it enters the humidification state to keep the indoor air at a certain humidity. If the humidification container is insufficient in water, ST intermittently turns on and off the power supply, and LED2 turns on and off alternately, indicating that water should be added.

Everyone is welcome to participate:
dismantle and evaluate to win prizes - you are only one dismantling away from truly owning it!
Welcome to click to read the original text and communicate with the author.
Follow EEWORLD (Electronic Engineering World) WeChat public account: reply "Submit", your original work will have the opportunity to appear in our WeChat push; add WeChat friends: "
HelloEeworld
" to not miss any WeChat activities.
To communicate with more netizens in the industry, please click to read the original text and log in to the EEWORLD forum.
 EEWORLD WeChat subscription account Get
the latest hot posts at your fingertips

 EEWORLD WeChat Service Account
EE Benefits At your fingertips


 京公网安备 11010802033920号