Building a Dehumidifier for a 3D Printing Dry Box
Source: InternetPublisher:蓝猫淘气 Keywords: Dehumidifier 3D printing drying oven Updated: 2024/12/19
This is a dehumidifier for 3D printing dryboxes that keeps filament dry without the need for desiccant.
Overview
After building this project, you will be able to equip your 3D printer drybox with a fully functional dehumidifier to keep your filament dry and ready for use. Dehumidifiers work using a Pel tier device, which transfers heat from one side of the device to the other, creating hot and cold sides. The cold side of the device creates condensation, which removes moisture from the air inside the drybox. The Peltier is sandwiched between two heat sinks, through which a fan blows. The fan provides cooling for the hot side of the Peltier, while also blowing away condensation that accumulates on the fins of the cold heat sink.
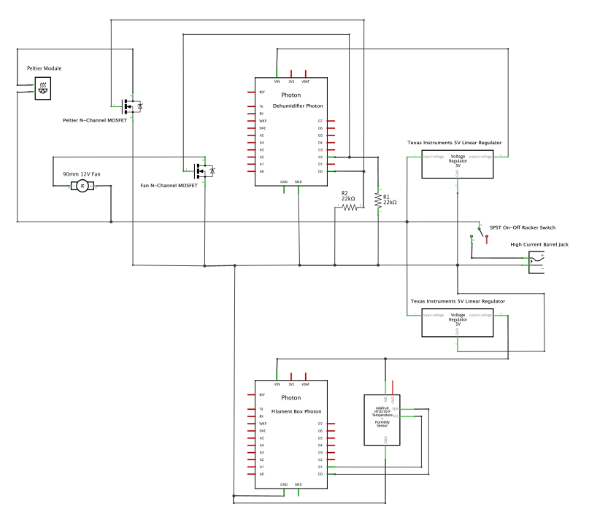
The dehumidifier is controlled by two Part icle Photons. One Photon controls the Peltier device while the other reads the humidity and temperature inside the drying cabinet. The two Photons communicate with each other to determine if the Peltier should be turned on or off and if the power level should be set to one or two (low or high). When the humidity level reaches approximately 30%, the high power mode kicks in. At this point, more moisture can be removed from the air only by going below freezing. The desired target humidity and other parameters can be set at the top of the code using predefined variables .
Build
First, disconnect the original barrel plug from the power source and solder on the new high-current barrel plug.
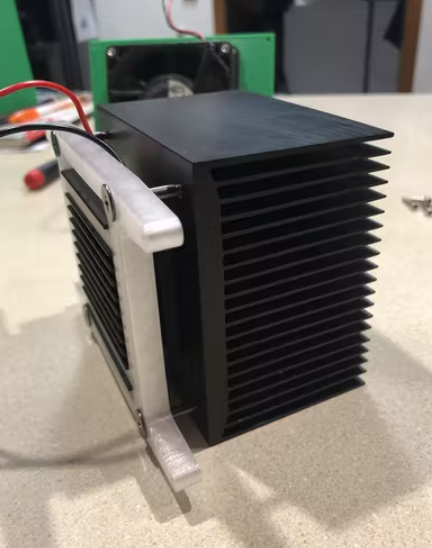
Assemble the two heat sinks and the Peltier module using thermal paste and the clamp brackets. Attach the clamp brackets using the fasteners provided with the large heat sink. Make sure to orient the fins of the large heat sink along the long side of the clamp as shown. Otherwise the heat sink will not fit properly into the case.
NOTE: The springs that came with the heat sink will not be used for this project.
Refer to the circuit schematic to assemble the electronics. If needed, connectors can be used for low current portions of the circuit.
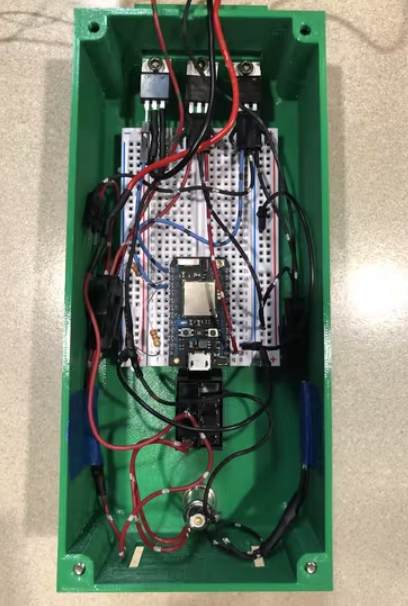
NOTE: Insert the rocker switch and high current barrel jack into the electronics housing box before connecting these two components to the rest of the circuit. Also make sure the wires that carry the 12V to the Photon in the filament box are long enough to pass through the outlet air tube and into the filament box.
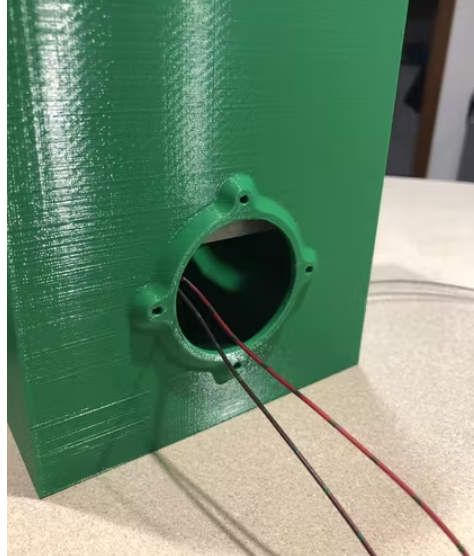
Place the Peltier assembly into its housing and secure with the four M3x16 screws.
NOTE: Tighten the screws only until they are snug.
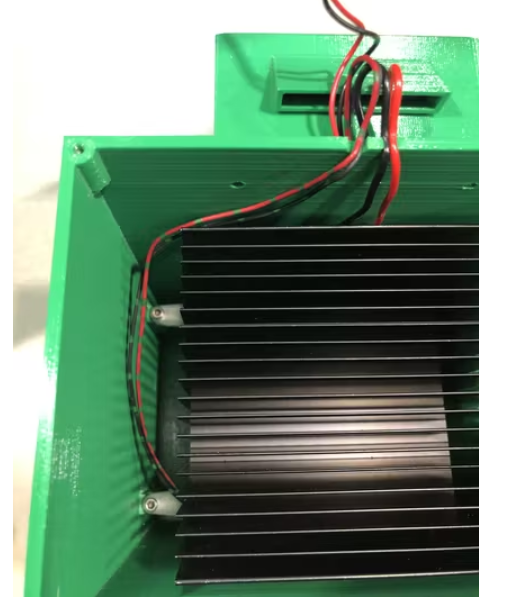
Secure the 90 mm fan to the top duct connector using the appropriate fasteners for the fan of your choice.
NOTE: Orient the fan so air is drawn through the small end of the top duct connector.

Attach the top pipe connector and electronics housing to the Peltier assembly housing while guiding the wires through the cutouts in the housing. Attach four M3x12 screws to the top pipe connector and four M3x6 screws to the electronics housing (WARNING: STOP TIGHTENING THE Screws for the electronics housing as soon as you feel any resistance or you will strip the threads. This is easy to do since the screws only engage the plastic by 3mm.)
NOTE: For some wire sizes, the cut may need to be enlarged.
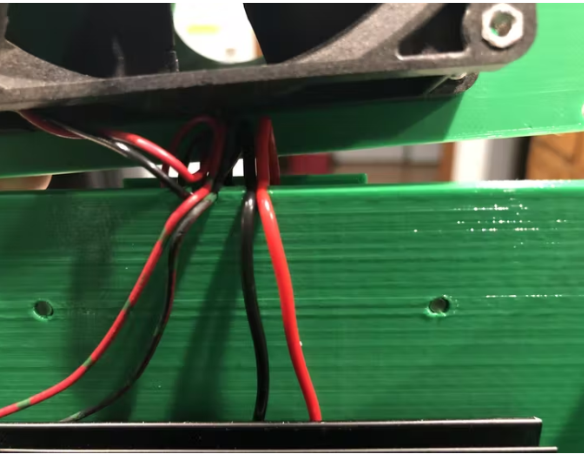
Attach the side tube connector to the Peltier assembly housing using four M3x10 screws. (WARNING: Tighten the screws slightly only after you first feel resistance, otherwise you will strip the threads. There is only 6mm of engagement here.)
Use 2-1/2" PVC pipe or equivalent OD tubing to move air in and out of the dehumidifier. The clamps can be tightened onto the pipe using M3 screws and nuts.
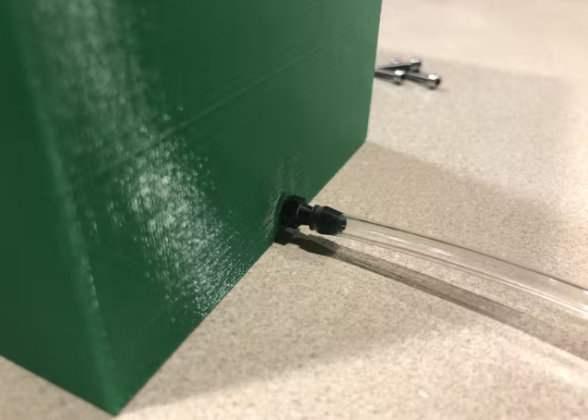
Thread the hose barb into the drain port near the bottom of the Pel ter housing assembly. Connect the polyurethane hose to the desired location. NOTE: Super glue or an appropriate sealant may be required to prevent leaks around the hose barb threads. If the hose barb will not be successfully threaded into the printed component, the polyurethane hose may be encouraged to fit into the hole without the barb and secured in place with super glue or other means.
peltier control code:
/* Prog ram description*/
// User Configuration
const float Power_Level_1 = 90; //Low power level in percent supplied to the Peltier module that will not cause the dehumidifier to ice up
const float Power_Level_2 = 100; //Supplies maximum power to the Peltier module but may cause the dehumidifier to ice up
const float Fan_Speed_1 = 40; //Fan speed in percent f or power level 1 above
const float Fan_Speed_2 = 60; //Fan speed in percent for power level 2 avove
const char Peltier_ MOSFET_ Pin = D0; //Pin that will control the Peltier MOSFET (Must be digital PWM)
const char Fan_MOSFET_Pin = D2; //Pin that will control the fan MOSFET (Must be digital PWM if anything other than 100 is used for the fan speeds)
const int Fan_PWM_Frequency = 20; //Frequency of the PWM signal that will be sent to the Fan
const int Peltier_PWM_Frequency = 500; //Frequency of the PWM signal that will be sent to the Peltier module
// Program Variables
bool request_Peltier_on = false;
float Peltier_power_level = (Power_Level_1/100)*255;
int Peltier_current_state = 0;
float Peltier_current_power_level = Peltier_power_level;
float fan_speed = (Fan_Speed_1/100)*255;
unsigned long last_millis = 0;
int update_interval = 60000;
// Recieved Data Handle rs
void on_off_request_handler(String event, String data) {
request_Peltier_on = data.toInt();
Particle.publish("Gunner_P/MEGR_3171/Dehumidifier_Filament_Box/Peltier_state", String(request_Peltier_on), 10);
}
void Peltier_power_handler(String event, String data) {
if (data.toInt() == 1) {
Peltier_power_level = (Power_Level_1/100)*255;
fan_speed = (Fan_Speed_1/100)*255;
Particle.publish("Gunner_P/MEGR_3171/Dehumidifier_Filament_Box/Peltier_power", String(1), 10);
}
if (data.toInt() == 2) {
Peltier_power_level = (Power_Level_2/100)*255;
fan_speed = (Fan_Speed_2/ 100)*255;
Particle.publish("Gunner_P/MEGR_3171/Dehumidifier_Filament_Box/Peltier_power", String(2), 10);
}
}
// Dehumidifier Manager
void dehumidifier_manager() {
if (request_Peltier_on && Peltier_current_state == 0) {
analogWrite(Peltier_MOSFET_Pin, Peltier_power_level, Peltier_PWM_Frequency);
Peltier_current_power_level = Peltier_power_level;
analogWrite(Fan_MOSFET_Pin, 255, Fan_PWM_Frequency);
delay(200);
analogWrite(Fan_MOSFET_Pin, fan_speed, Fan_PWM_Frequency);
Peltier_current_state = 1;
}
if (!request_Peltier_on && Peltier_current_state == 1) {
analogWrite(Peltier_MOSFET_Pin, 0);
analogWrite(Fan_MOSFET_Pin, 0);
Peltier_current_state = 0;
}
if (Peltier_current_state == 1 && Peltier_current_power_level != Peltier_power_level) {
analogWrite(Peltier_MOSFET_Pin, Peltier_power_level, Peltier_PWM_Frequency);
Peltier_current_power_level = Peltier_power_level;
analogWrite(Fan_MOSFET_Pin, 255, Fan_PWM_Frequency);
delay(200);
analogWrite(Fan_MOSFET_Pin, fan_speed, Fan_PWM_Frequency);
}
}
// Setup
void setup() {
pinMode(Peltier_MOSFET_Pin, OUTPUT);
pinMode(Fan_MOSFET_Pin, OUTPUT);
Particle.subscribe ("Elijah_C_MEGR_3171_Dehumidifier_Filament_Box_Project", on_off_request_handler);
Particle.subscribe("Elijah_C_MEGR_3171_Peltier_Power_Level_Dehumidifier_Box", Peltier_power_handler);
Particle.publish("Gunner_P/MEGR_3171/Dehumidifier_Filament_Box/Peltier_state", String(request_Peltier_on), 10);
}
// Loop
void loop() {
if (millis() - last_millis >= update_interval); {
dehumidifier_manager();
last_millis = millis();
}
}

ThingSpeak records the real-time humidity and temperature of the drying box and the power status of the dehumidifier. You can check the status of the dehumidifier anytime and anywhere to ensure that the system is operating normally. Note: The chart shown above contains data reported every 30 seconds, not the 5-minute default set in the code.
- Share a solar beacon circuit
- Share an electronic touch organ circuit
- IoT-based weather data logger
- DIY a simple weather station
- Designing a Simple Solar Voltage Regulator PCB
- A novel resonance demonstration device
- Using VPX-based PCIe systems for asynchronous clocking
- Input and output polarity reversal circuit composed of MAX660
- Homemade Micro AC Welding Machine
- DIY a temperature and humidity monitoring system
- How does an optocoupler work? Introduction to the working principle and function of optocoupler
- 8050 transistor pin diagram and functions
- What is the circuit diagram of a TV power supply and how to repair it?
- Analyze common refrigerator control circuit diagrams and easily understand the working principle of refrigerators
- Hemisphere induction cooker circuit diagram, what you want is here
- Circuit design of mobile phone anti-theft alarm system using C8051F330 - alarm circuit diagram | alarm circuit diagram
- Humidity controller circuit design using NAND gate CD4011-humidity sensitive circuit
- Electronic sound-imitating mouse repellent circuit design - consumer electronics circuit diagram
- Three-digit display capacitance test meter circuit module design - photoelectric display circuit
- Advertising lantern production circuit design - signal processing electronic circuit diagram


 京公网安备 11010802033920号