Build an Automatic Candy Vending Machine
Source: InternetPublisher:闪电杰克 Keywords: Automation DIY vending machines Updated: 2024/12/31
Simply the machine has four types of candies, each type has its special code, which can be used to get the candies in the box. Actually, we intend to motivate children to create their own toys using modern technology instead of wasting a lot of time playing with smartphones or PCs.
Back to the project,
If you want candy from the first flavor, you should write C111 in your copy.
If you want candy from the second flavor, you should write C112 in your copy.
If you want candy from a third flavor, you should write C113 in your copy.
If you want candy from the fourth flavor, you should write C114 in your copy.
Step 1: What You Need

These are the things you will need for this project:
tool:
1. Screwdriver
2. Pliers
3. Flat cutter
4. Digital Multimeter
5. Double-sided tape.
6. Copper spacer (6mm male-female)
7. Tape
Material:
1. Acrylic sheet 3mm
2. Plywood 3mm
3. Screws and nuts
Components:
1. 8 x standard metal servo motors (7.5 kg.cm)
2. Bolt M4 x 10mm
Electronic components:
1. Arduino MEGA 2560
2. 1 Sheel
3. Switching power supply (5V - 5A)
4. Small breadboard
5. Jumper wire (male-male)
6. Jumper wire (male-female)
Step 2: Mechanism and framework design

It all starts with a proper design, in my case some sketches to get a good feel for the size and shape. The sketching phase is quickly followed by the CAD model. I create my models in SolidWorks. After all the parts are modeled, technical drawings are made. I use these drawings to machine all the custom parts on the laser cutter.
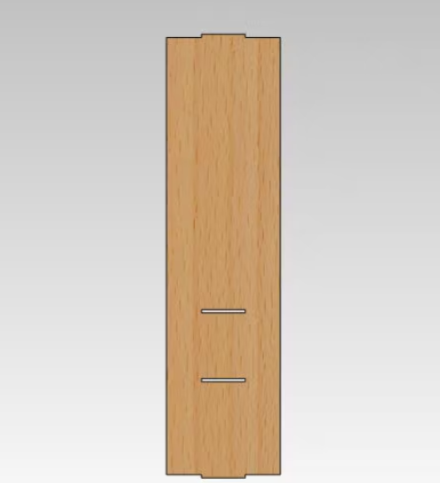
Since I plan to take this machine with me to many events around the world, I designed it to be easy to disassemble and install, so I used screws and nuts, Martise and Tenon to secure all its parts.
Step 3: Mechanism and Frame (Fabrication and Assembly)

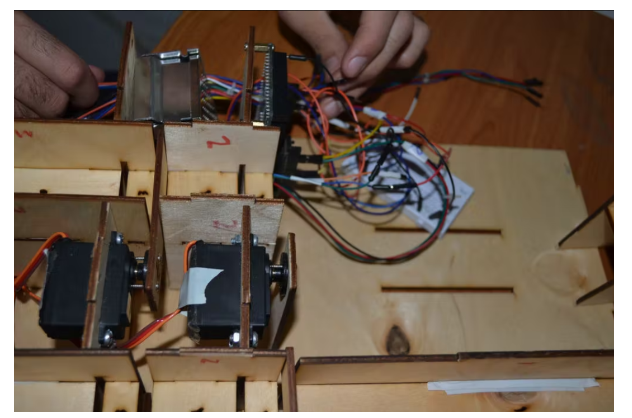
I used a laser cutter to cut the machine parts from plywood and acrylic sheets. Then I fixed the servo motors to their carriers with M4*10mm bolts. After fixing the servo motors, fix the Arduino Mega and 1sheeld to their carriers using copper spacers, then fix the power supply, now you can gather all the machine parts together.
Step 4: Electronics and Arduino Code

The most important part here is to power the servo motors, you should power the servo motors directly from the power supply to avoid breaking the Arduino board. Don't forget to connect all the ground wires to each other After connecting the motors with the Arduino and 1Sheeld, power them from the power supply, you should follow these steps:
Step 1: Place the 1Sheeld on the Arduino board and plug the Arduino into your laptop or PC.
Step 2: Download the 1Sheeld app to your smartphone. The app is available on the Google Play Store at http://1sheeld.com/app
Step 3: Download the 1Sheeld library
Step 4: Unzip the folder, copy and paste it into your Arduino libraries directory.
Step 5: Open my Arduino Sketch (you will find it in the attachment
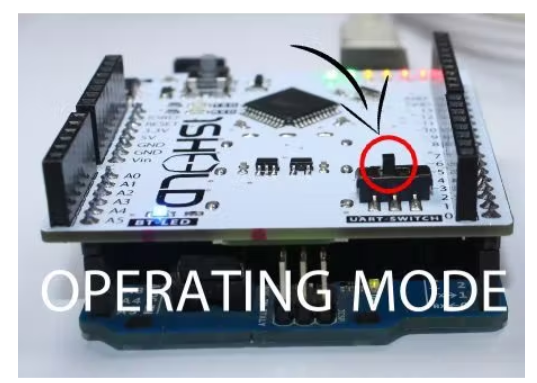
Step 6: Upload your sketchHesre the most important part of the whole tutorial, switch the 1Sheeld to Uploading-mode (it's the switch labeled UART Switch on the board) before uploading your sketch to the Arduino board to avoid serial conflicts between the 1Sheeld and the Arduino, then press the Upload button in the IDE.
When the UART switch is pushed away from the 1Sheeld logo, upload mode is turned on.
Once you are done uploading, you will need to switch the 1Sheeld back to Operational Mode. Don't forget! If you do not switch the UART switch back to Operational Mode, your project will not work properly as there will be no communication between the 1Sheeld and the Arduino board.
When the UART switch is pushed closest to the 1Sheeld mark, the operation mode is turned on.
Step 7: Use the 1Sheeld App
Open the 1Sheeld app on your Android smartphone. The app will first scan for your 1Sheeld via Bluetooth, this will take a few seconds and the phone will find it. Once it shows up on the screen as 1Sheeld #xxxx, you will need to enter the pairing code (the default pairing code is 1234) and connect to the 1Sheeld via Bluetooth.
NOTE: If you experience issues, make sure your Android phone's Bluetooth is turned on and that your Android phone is close to your 1Sheeld.
Step 8: Access Twitter and Terminal Shields
Select Twitter Shield and Terminal Shield from the list of shields and press the multiple shields icon in the upper right corner of the app.
Vending Machine.ino:
#define CUSTOM_SETTINGS
#define INCLUDE_TWITTER_SHIELD
#define INCLUDE_TERMINAL_SHIELD
#include
Servo BlockColoumn1; // create servo object to control a servo
Servo BlockCandy1; // create servo object to control a servo
Servo BlockColoumn2; // create servo object to control a servo
Servo BlockCandy2; // create servo object to control a servo
Servo BlockColoumn3; // create servo object to control a servo
Servo BlockCandy3; // create servo object to control a servo
Servo BlockColoumn4; // create servo object to control a servo
Servo BlockCandy4; // create servo object to control a servo
void setup()
{
OneSheeld.begin();
BlockColoumn1.attach(3); // attaches the servo on pin 3 to the servo object
BlockCandy1.attach(4); // attaches the servo on pin 4 to the servo object
BlockColoumn2.attach(5); // attaches the servo on pin 5 to the servo object
BlockCandy2.attach(6);// attaches the servo on pin 6 to the servo object
BlockColoumn3.attach(7); // attaches the servo on pin 7 to the servo object
BlockCandy3.attach(8); // attaches the servo on pin 8 to the servo object
BlockColoumn4.attach(9); // attaches the servo on pin 9 to the servo object
BlockCandy4.attach(10); // attaches the servo on pin 10 to the servo object
/* Subscribe to setOnSelected event for the Twitter shield. */
Twitter.setOnSelected(&shieldSelection);
/* Subscribe to onNewTweet event. */
Twitter.setOnNewTweet(&myTweet);
}
void loop()
{
}
void shieldSelection()
{
/* Track keyword 1Sheeld on Twitter. */
Twitter.trackKeyword("C111");
Twitter.trackKeyword("C112");
Twitter.trackKeyword("C113");
Twitter.trackKeyword("C114") ;
}
void myTweet(char * userName , char * userTweet)
{
/* Check if the tweet has 1Sheeld keyword. */
if (strstr(userTweet, "C111") != 0)
{
BlockCandy1.write(90);
OneSheeld.delay( 400);
BlockCandy1.write(180);
OneSheeld.delay(20);
BlockColoumn1.write(90);
OneSheeld.delay(400);
BlockColoumn1.write(180);
Terminal.println(" C111 Detected");
}
else if (strstr(userTweet, "C112") != 0)
{
BlockCandy2. write(90);
OneSheeld.delay(400);
BlockCandy2.write(180);
OneSheeld.delay(20);
BlockColoumn2.write(90);
OneSheeld.delay(400);
BlockColoumn2.write(180);
Terminal.println(" C112 Detected");
}
else if (strstr(userTweet, "C113") != 0)
{
BlockCandy3.write(90);
OneSheeld. delay(400);
BlockCandy3.write(180);
OneSheeld.delay(20);
BlockColoumn3.write(90);
OneSheeld.delay(400);
BlockColoumn3.write(180);
Terminal.println(" C113 Detected");
}
else if (strstr(userTweet, "C114") != 0)
{
BlockCandy4.write(90);
OneSheeld.delay(400);
BlockCandy4.write(180);
OneSheeld.delay(20);
BlockColoumn4.write(90);
OneSheeld.delay(400);
BlockColoumn4.write(180);
Terminal.println(" C114 Detected");
}
else
{
BlockCandy1.write(180);
BlockColoumn1.write(180);
BlockCandy2.write(180);
BlockColoumn2. write(180);
BlockCandy3.write(180);
BlockColoumn3.write(180);
BlockCandy4.write(180);
BlockColoumn4.write(180);
Terminal.println("Nothing Detected");
}
}// void my tweet
- How to Make a Bass Boost Speaker Box
- Share a board game electronic dice circuit
- Share a project that controls the mouse pointer by moving the index finger
- Using BMP280 to make a weather station
- How to Design an Automatic IoT Egg Incubator Using ESP8266
- Design of a drone wildlife counting system using FOMO object detection algorithm
- DIY Solar Detector
- Analysis of the circuit of DL-01 low-frequency electrotherapy instrument
- Ultrasonic electronic guide circuit
- How to Design a Smart Garbage Monitoring System Using IoT
- Car glass hail melting circuit design
- Circuit diagram of an automatic water level controller
- How does an optocoupler work? Introduction to the working principle and function of optocoupler
- 8050 transistor pin diagram and functions
- What is the circuit diagram of a TV power supply and how to repair it?
- Analyze common refrigerator control circuit diagrams and easily understand the working principle of refrigerators
- Hemisphere induction cooker circuit diagram, what you want is here
- Circuit design of mobile phone anti-theft alarm system using C8051F330 - alarm circuit diagram | alarm circuit diagram
- Humidity controller circuit design using NAND gate CD4011-humidity sensitive circuit
- Electronic sound-imitating mouse repellent circuit design - consumer electronics circuit diagram


 京公网安备 11010802033920号