Make a draft beer machine using Windows 10 UWP
Source: InternetPublisher:风向双子座 Keywords: WINDOWS APPS DIY DESIGN Updated: 2024/12/27
Use the power of a Windows 10 UWP app to control and monitor your beer kegs and keep your drinks cool, fresh, and ready to go.
NOTE: First of all, this project in no way advocates the use or abuse of alcohol, it is entirely up to the user what beverages they drink in this kegerator.
This project was born out of a desire to better manage draft beer machines. The basic principle of a draft beer machine is to keep the drink cold and carbonate it at a certain PSI. In addition, just pour yourself a cold drink and you have no idea how much is left in the keg.
So the goals of this project are:
Maintains a consistent temperature of your beverage, ensuring it doesn't overheat or overcool and freeze
Ensure acceptable carbonation levels are applied to kegs to maintain optimal flavor
Tracks the amount of drink in each bucket and provides visual feedback to ensure you have enough drinks ready for the big game.
Tracking the amount of CO2 remaining in cans used for carbonated beverages
Basic electronic components and their uses:
Refrigerator cabinets are used to cool units and provide frames to create fine furniture
A Raspberry PI 2 running Windows 10 IoT core is used as the brain of the operation
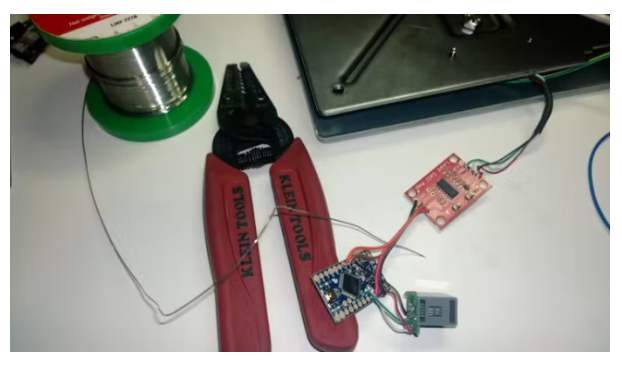
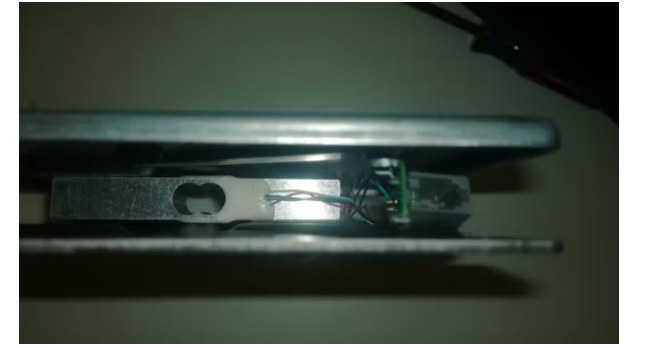
Small postage scales are used to measure the weight of each keg and CO2 canister, these postage scales have the electronics removed and have a load cell amplifier and a small Arduino built into the scale. These scales will communicate with the Raspberry PI 2 via I2C (more on this later)
There are 5 digital temperature sensors mounted on the unit, one on the bottom of the freezer, one mounted on the underside of the top, one mounted on the tower where the faucet handle is located (more on this later) and one mounted on the outside of the unit to measure the ambient temperature. These temperature sensors are connected to a small Arduino and also communicate with a Raspberry PI 2 via I2C
A Honeywell pressure sensor is connected to the air line used to provide carbonation to the keg. While the adjustment of the PSI is manual (for now), this will provide an accurate gauge to determine the amount of CO2 in the keg.
The 5V power supply is used to power the Raspberry PI 2. A larger version (providing up to 6 amps) was chosen so it can also power the addressable LED strips.
A simple relay is connected in series with the compressor power supply. Using this relay, power can be applied and removed from the compressor, which in turn will control the temperature of the kegerator (more on this later)
Cloud Connectivity
Ultimate Kegerator includes a web server that allows remote configuration via REST services as well as a simple static view of the current state. The website can be accessed via http://slsys.homeip.net:9501.
In addition, Ultimate Kegerator uploads its vital statistics to Windows Azure Event Hubs. While you can’t use the standard Nuget package to talk to Event Hubs, you can use an easy-to-implement library provided by Windows Embedded MVP Paolo Patierno at
https://www.nuget.org/packages/AzureSBLite/
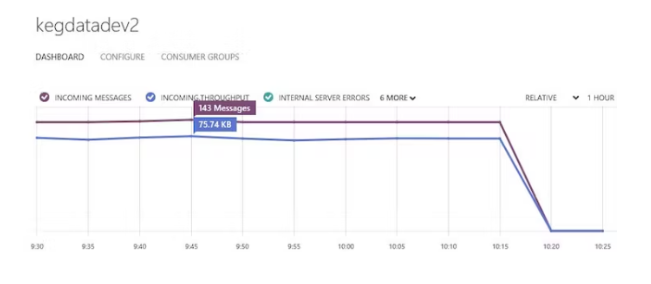
The data is pushed to an event hub on Windows Azure:
Final processing via stream analytics
Data being processed by Stream Analytics on Windows Azure:
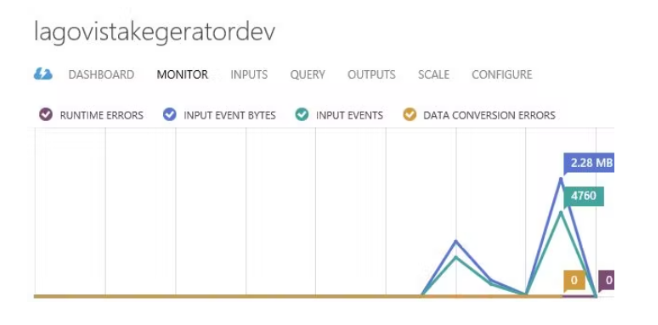
The final plan for Stream Analytics is:
1) Monitor and notify if the temperature is too hot or too cold
2) Monitor and notify when CO2 tank is low
3) Monitor and notify if a leak is detected in the CO2 tank (gradual weight loss)
Here are some additional pictures of the assembly process:
Electronic scale assembly
Load Cell:
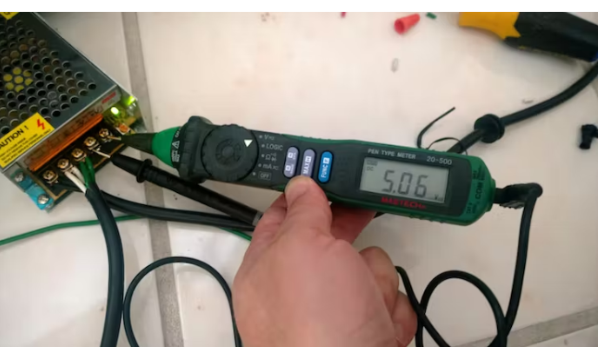
Testing the +5VDC regulator:
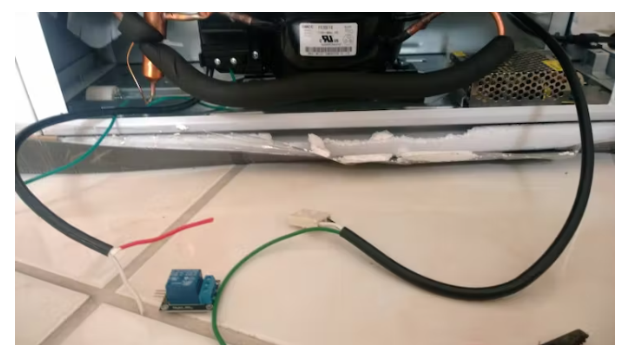
To prepare the connections when testing the compressor relay:
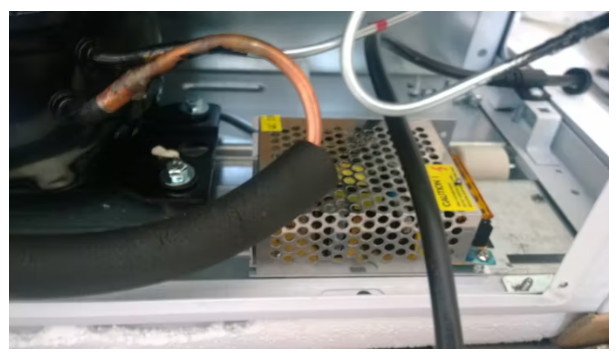
power supply:
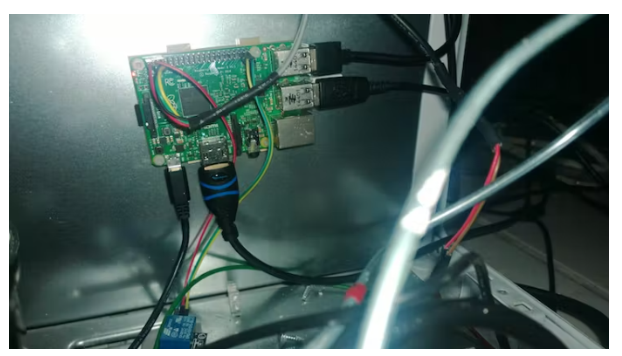
CPU:
Connect the temperature sensor:
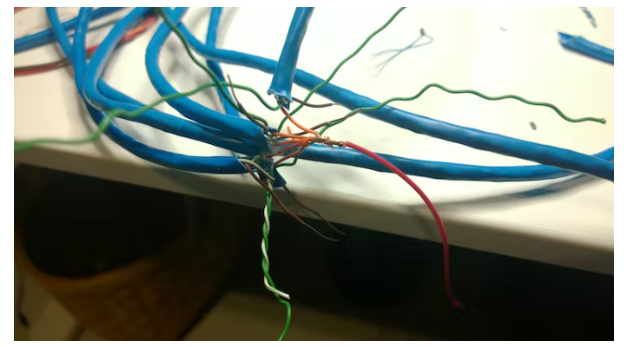
Final package of Arduino:

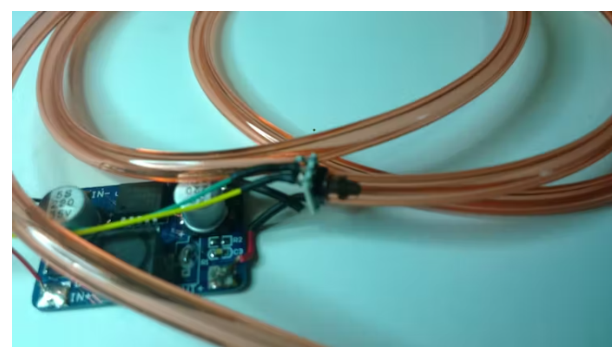
Pressure sensor and its +5VDC to +3.3VDC regulator:
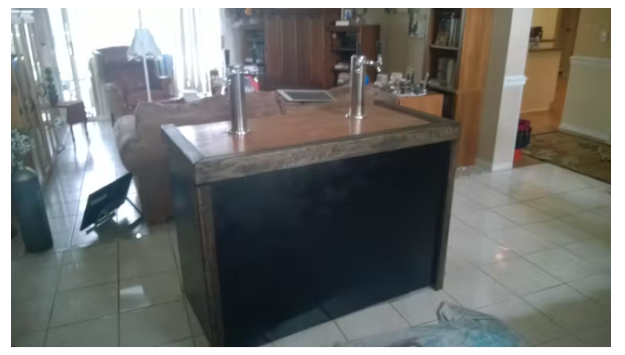
Final Result:
Kegerator Class:
using LagoVista.Common.Commanding;
using System;
using System.Collections.Generic;
using System.Collections.ObjectModel;
using System.ComponentModel;
using System.Linq;
using System.Runtime.CompilerServices;
using System.Text;
using System.Threading .Tasks;
using Windows.Devices.Enumeration;
using Windows.Devices.I2c;
namespace LagoVista.IoT.Common.Kegerator
{
public class Kegerator : INotifyPropertyChanged
{
public event PropertyChangedEventHandler PropertyChanged;
private Models.Keg _keg1;
private Models.Keg _keg2;
private Models.Keg _keg3;
private Models.Keg _keg4;
private CO2.CO2Tank _co2Tank;
private Kegerator() { }
public List
private void RaisePropertyChanged([CallerMemberName] string propertyName = null)
{
var eventHandler = this.PropertyChanged;
if (eventHandler != null)
{
eventHandler(this, new PropertyChangedEventArgs(propertyName));
}
}
private bool Set
storage = value;
this.RaisePropertyChanged(propertyName);
return true;
}
byte[] _scalesAddresses = { 0x43, 0x41, 0x40, 0x42 };
private const string I2C_CONTROLLER_NAME = "I2C1";
private Thermo.Temperatures _temperatures;
private Thermo.Controller _tempController;
private Scales.Scale _co2Scale;
private Dictionary
private CO2.PressureSensor _pressureSensor;
private LED.LEDManager _ledManager;
private REST.KegeratorServices _kegServices;
private static Kegerator _kegerator = new Kegerator();
public static Kegerator Instance { get { return _kegerator; } }
private CloudServices.EventHubClient _eventHubClient;
System.Threading.Timer _timer;
private bool _initialized = false;
public async Task Init()
{
if (!_initialized)
{
_initialized = true;
var selector = I2cDevice.GetDeviceSelector(I2C_CONTROLLER_NAME); /* Find the selector string for the I2C bus controller */
var deviceInfo = (await DeviceInformation.FindAllAsync(selector )).FirstOrDefault(); /* Find the I2C bus controller device with our selector string */
var deviceId = deviceInfo == null ? (string)null : deviceInfo.Id;
_temperatures = new Thermo.Temperatures(0x48);
await _temperatures.Init(deviceId);
_devices.Add(_temperatures);
_tempController = new Thermo.Controller();
_tempController.Init(_temperatures);
_devices.Add(_tempController);
_pressureSensor = new CO2.PressureSensor();
await _pressureSensor.Init(deviceId, TimeSpan.FromSeconds(1));
_devices.Add(_pressureSensor);
_co2Scale = new Scales.Scale(0x44);
await _co2Scale.Init(deviceId, TimeSpan.FromSeconds(1));
_devices.Add(_co2Scale);
_co2Tank = new CO2.CO2Tank(_co2Scale, TimeSpan.FromSeconds(2));
_co2Tank.Load();
_devices.Add(_co2Tank);
_kegScales = new Dictionary
_eventHubClient = new CloudServices.EventHubClient(this, TimeSpan.FromSeconds(2));
_devices.Add(_eventHubClient);
for (var idx = 0; idx < 4; ++idx)
{
var scale = new Scales.Scale(_scalesAddresses[idx]);
await scale.Init(deviceId, TimeSpan.FromMilliseconds(500));
_kegScales.Add(idx , scale);
_devices.Add(scale);
}
_keg1 = new Models.Keg(1, _kegScales[0], TimeSpan.FromMilliseconds(500));
_keg1.Load();
_devices.Add(_keg1);
_keg2 = new Models.Keg(2, _kegScales[1], TimeSpan .FromMilliseconds(500));
_keg2.Load();
_devices.Add(_keg2);
_keg3 = new Models.Keg(3, _kegScales[2], TimeSpan.FromMilliseconds(500));
_keg3.Load();
_devices.Add(_keg3);
_keg4 = new Models.Keg(4, _kegScales[3], TimeSpan.FromMilliseconds(500));
_keg4.Load();
_devices.Add(_keg4);
DateInitialized = DateTime.Now.ToString();
Web.WebServer.Instance.StartServer();
_kegServices = new REST.KegeratorServices() { Port = 9500 };
_kegServices.EventContent += _kegServices_EventContent;
_kegServices.StartServer();
_timer = new System.Threading.Timer((state) =>
{
Refresh();
}, null, 0, 250);
}
}
private void _kegServices_EventContent(object sender, string e)
{
var parts = e.Split('/');
if (parts.Count() > 0)
{
switch (parts[1])
{
case "zero":
{
var scaleIndex = Convert.ToInt32(parts[2]);
_kegScales[scaleIndex].StoreOffset();
}
break;
case "cal":
{
var scaleIndex = Convert.ToInt32(parts[2]);
_kegScales[scaleIndex].CalibrationWeight = Convert.ToDouble(parts[3]);
_kegScales[scaleIndex].Calibrate();
}
break;
}
}
}
public void Refresh()
{
foreach (var device in _devices)
{
if (DateTime.Now > (device.LastUpdated + device.UpdateInterval))
device.Refresh();
}
LagoVista.Common.PlatformSupport.Services.DispatcherServices.Invoke(() =>
{
CurrentTimeDisplay = DateTime.Now.ToString();
RaisePropertyChanged("CurrentTimeDisplay");
});
}
public Thermo.Temperatures Temperatures { get { return _temperatures; } }
public Thermo.Controller TemperatureController { get { return _tempController; } }
private String _statusMessage;
public String StatusMessage
{
get { return _statusMessage; }
set { Set(ref _statusMessage, value); }
}
public List
public void ToggleCompressor()
{
if (_tempController.IsCompressorOn)
_tempController.CompressorOff();
else
_tempController.CompressorOn();
}
public String DateInitialized
{
get;
set;
}
public String CurrentTimeDisplay
{
get;
set;
}
public Scales.Scale CO2Scale
{
get { return _co2Scale; }
}
public CO2.PressureSensor PressureSensor
{
get { return _pressureSensor; }
}
public Models.Keg Keg1 { get { return _keg1; } }
public Models.Keg Keg2 { get { return _keg2; } }
public Models.Keg Keg3 { get { return _keg3; } }
public Models.Keg Keg4 { get { return _keg4; } }
public CO2.CO2Tank CO2Tank { get { return _co2Tank; } }
public RelayCommand ToggleCompressorCommand { get { return new RelayCommand(ToggleCompressor); } }
}
}
- DIY an electromagnetic glove
- Share a solar beacon circuit
- Build a Raspberry Pi-based QR code scanner
- Design a BLE thermos cup using M5Stack
- Homemade video switcher
- Satellite TV Set Top Box Remote Controller
- The production principle of high voltage self-defense flashlight and electric stick
- How to create image processing solutions using HLS capabilities
- How to build an internet-connected traffic meter
- How to use ultrasonic sensors to make a simple nucleic acid sampling machine
- How does an optocoupler work? Introduction to the working principle and function of optocoupler
- 8050 transistor pin diagram and functions
- What is the circuit diagram of a TV power supply and how to repair it?
- Analyze common refrigerator control circuit diagrams and easily understand the working principle of refrigerators
- Hemisphere induction cooker circuit diagram, what you want is here
- Circuit design of mobile phone anti-theft alarm system using C8051F330 - alarm circuit diagram | alarm circuit diagram
- Humidity controller circuit design using NAND gate CD4011-humidity sensitive circuit
- Electronic sound-imitating mouse repellent circuit design - consumer electronics circuit diagram
- Three-digit display capacitance test meter circuit module design - photoelectric display circuit
- Advertising lantern production circuit design - signal processing electronic circuit diagram


 京公网安备 11010802033920号