How to connect TFT LCD to Raspberry Pi
Source: InternetPublisher:拿铁三分糖 Keywords: HDMI touch screen display Raspberry Pi Updated: 2024/12/24
Raspberry pi is a credit card sized compact computer which is very popular nowadays for IoT applications and high computing applications like data science, python, machine learning etc. Many applications require an external display to be connected with Raspberry Pi. In such cases, Raspberry Pi has its own HDMI interface to connect external display like TV or monitor. But in some applications, a compact display is suitable and touch screen input is preferred through GUI applications. For these applications, HDMI touch screen display can be used. Today we will connect 5 inch HDMI touch screen display with Raspberry Pi and will also learn to calibrate the touch screen to improve its accuracy.
Materials used
Raspberry Pi 3 B (in my case)
5-inch 800x480 TFT display with touch screen
16 GB Micro SD card
HDMI Connector
Stylus
5V, 2.4 AMP Power Supply
USB keyboard
USB Mouse
5-inch 800x480 TFT touch screen display

The 5" Touchscreen Raspberry Pi Display is a TFT HDMI display that is very compact and can be used with Raspberry Pi A, B, Pi B+/2B and 3B models. Built-in resistive touch screen, supports backlight control, power saving and supports HDMI input. It acts as a computer monitor with a resolution of 800x480 pixels.
feature:
5-inch HDMI monitor
800x480 px high resolution pictures and large screen.
Built-in resistive touch screen with backlight control to reduce power consumption.
Wide viewing angle
Fast response time and full color display.
Technical Specifications:
Size: 5 inches
Resolution: 800 * 480
Display Controller: XPT2046
LCD interface: SPI
Touch type: Resistive
LCD screen type: TFT
Connecting 5-inch TFT LCD to Raspberry Pi
1. Place the LCD on top of the Raspberry Pi:

The first step to connect the LCD with the Raspberry Pi is to connect the LCD with the pi using the GPIO connector. The display comes with four corner brackets for mounting. Then, place the LCD on top of the Raspberry Pi so that it slides into the GPIO slots and the HDMI port will line up perfectly on the other side. Be careful when connecting the LCD to the Pi as the LCD uses only 26 pins to connect with the Pi.
2. Connect the HDMI connector:

With the LCD placed on top of the Raspberry Pi, connect the HDMI connector included in the LCD box between the Pi and the LCD as shown below:
3. Connect the power supply:
After completing all the above steps, we need to power the Raspberry Pi and the LCD. There is also a USB plug on the LCD for separate power, but as long as your Pi has a good 2.4 amp power supply, it does not require a separate power supply for the LCD.
4. Turn on the LCD backlight switch:
After the power is on, turn on the backlight .
Installing drivers for the 5-inch LCD in Raspberry Pi
1. Edit some parameters in the configuration file :
Before downloading the LCD driver, make some changes in the configuration file as shown below. The configuration file can be found using the following command:
sudo nano /boot/config.txt
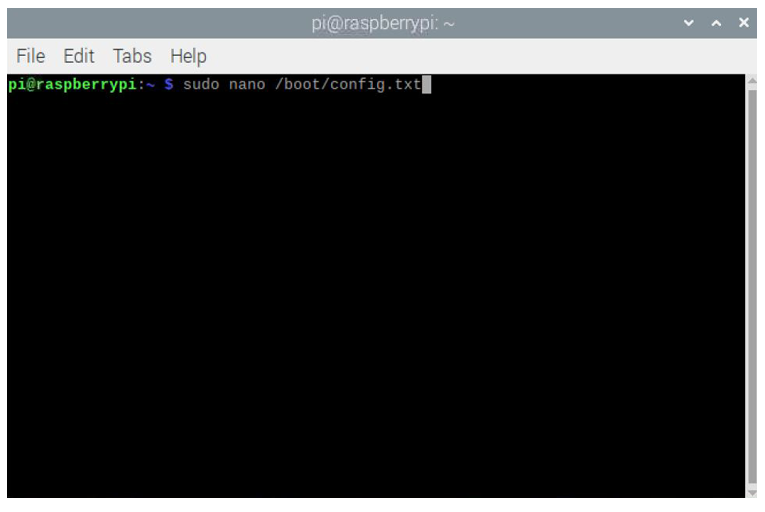
Next, simply append the following line to your configuration file.
max_usb_current = 1
hdmi_group=2
hdmi_mode=87
hdmi_cvt 800 480 60 6 0 0 0
hdmi_drive=1
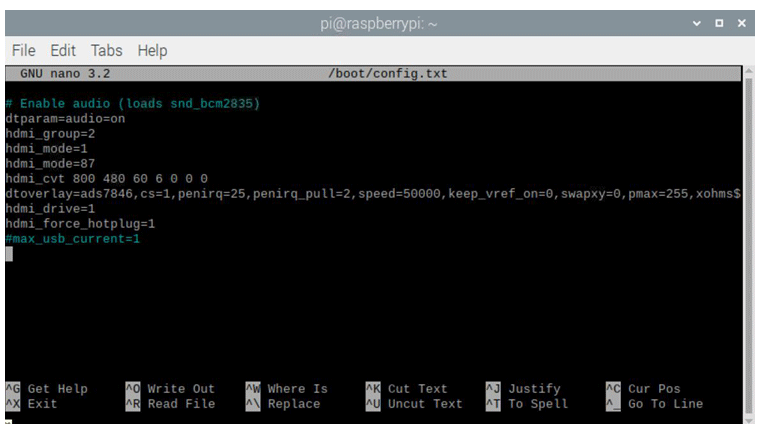
Note: In some cases, you only need to uncomment the above statements in your config. file, if the file already contains the above statements in a commented line.
2. Download the driver:
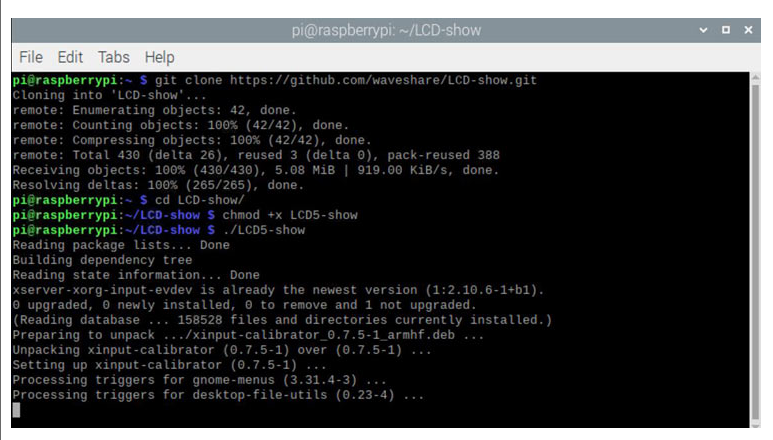
First download the driver from github. This can be done by typing the following command in the Raspberry pi terminal.
git clone https://github.com/waveshare/LCD-show.git

3. Enable the display:
After the driver is successfully installed, we can use the following command to turn on the display:
cd LCD-show/
chmod +x LCD5-show
./LCD5-show
《》4. Restart the Raspberry Pi
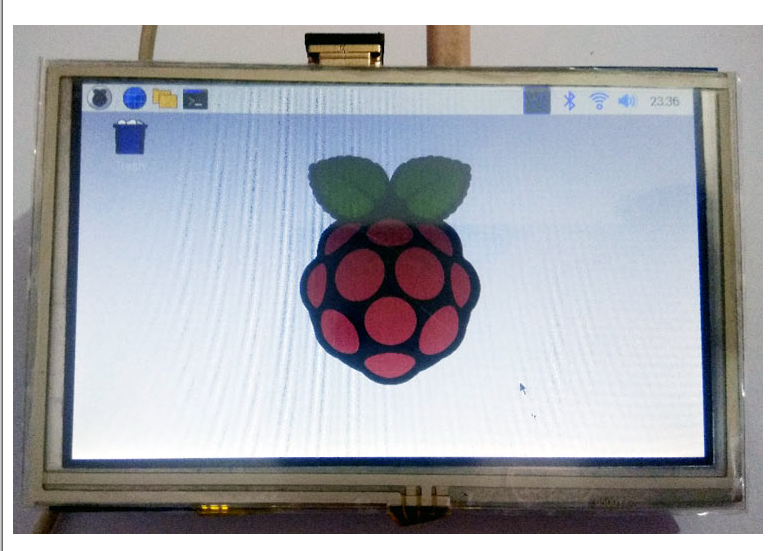
After running the above command, the pi will automatically reboot and the screen should now work. This can be seen in the image below:
Raspberry Pi touch screen calibration
The last part of the process is to calibrate the touch screen for optimal working. For this we should install an application called " xinput-calibrate " in our pi.
In order to install the program we have to run the following command:
sudo apt-get install -y xinput-calibrator
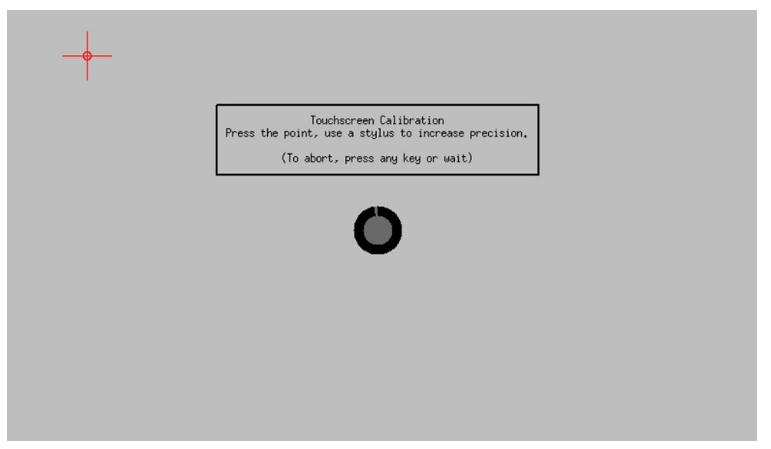
After the above program is successfully installed, click the menu button on the Raspberry Pi taskbar and select Preference -> Calibrate Touchscreen. Then follow the prompts to complete the touch screen calibration. The touch screen calibration window should look like this:

Simply touch the red marked point with the stylus, then touch all 4 consecutive red points on the screen, and the calibration parameters will be prompted on the screen as shown below:
Just save the above parameters and reboot the Raspberry Pi. Now, our display settings are complete and we can use the 5-inch touch screen with LCD without any problems.
This is how TFT LCD is connected with Raspberry Pi and can be used to build applications like games, alarm clocks, tablets, etc.
- How to build a light source that adjusts its brightness based on atmospheric conditions
- Share an electronic mouse repellent circuit
- Using BMP280 to make a weather station
- How to create a digital watch using YAKINDU Statechart Tools
- DIY an indoor and outdoor webcam
- DIY an open source air quality monitor
- Analysis of the circuit principle of ZX5-630 welding machine
- Electronic fly killer
- High power laser constant current drive circuit
- DIY a temperature and humidity monitoring system
- How does an optocoupler work? Introduction to the working principle and function of optocoupler
- 8050 transistor pin diagram and functions
- What is the circuit diagram of a TV power supply and how to repair it?
- Analyze common refrigerator control circuit diagrams and easily understand the working principle of refrigerators
- Hemisphere induction cooker circuit diagram, what you want is here
- Circuit design of mobile phone anti-theft alarm system using C8051F330 - alarm circuit diagram | alarm circuit diagram
- Humidity controller circuit design using NAND gate CD4011-humidity sensitive circuit
- Electronic sound-imitating mouse repellent circuit design - consumer electronics circuit diagram
- Three-digit display capacitance test meter circuit module design - photoelectric display circuit
- Advertising lantern production circuit design - signal processing electronic circuit diagram


 京公网安备 11010802033920号