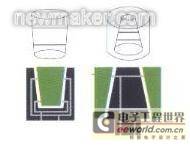
float pneumatic measuring instrument has been used for decades at home and abroad, and has been effectively applied to various industries of mechanical manufacturing. It has the following characteristics: simple structure; convenient assembly, debugging and maintenance; the magnification adjustment valve and the zero adjustment valve are not easy to be blocked and easy to clean; the tapered glass tube is pressed by the end face, with reliable sealing and convenient loading and unloading; the float structure is reasonable and stable; except for individual parts, it has good processability and low processing cost. Its disadvantage is that there is mutual interference between the tubes of the multi-tube measuring instrument, which is not suitable for automatic measurement.
Inner diameter and outer diameter: pneumatic measuring instruments are often used to measure the size or shape of the inner diameter of the hole and the outer diameter of the circle of the workpiece. Two-nozzle pneumatic probe - with two opposite nozzle holes, it is often used to measure the inner diameter of the hole, while the two-nozzle pneumatic plug rule is mainly used to measure the outer diameter.
Average value: a measuring tool with multiple nozzles evenly distributed on a circular surface can complete the measurement of the average value for the user. This measuring tool is mainly used for thin-walled components or special circular surface components. Four, six or more nozzles can be used, and the number of nozzles will depend on the size of the measuring tool.
Roundness: Special round surfaces: Pneumatic measuring instruments can measure the roundness of workpieces. For the case of two points not being round, a common two-nozzle pneumatic probe is sufficient. If it is an odd number of circles, the number of nozzles must be increased accordingly according to the number of odd circles.
Straightness: Another common use of pneumatic measuring instruments is for dynamic measurement of the straightness or curvature of holes. In such measurements, a special pneumatic probe can simply and quickly measure the straightness of the inner hole of the measured workpiece.
Perpendicularity: To measure the perpendicularity of a workpiece, such as measuring the perpendicularity of a hole relative to a certain surface, a pneumatic probe with a "Z"-shaped nozzle can be moved in the measured hole. According to the change in back pressure, the change in perpendicularity can be measured.
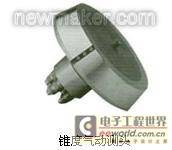
Taper: The change in taper can be easily measured by a pneumatic measuring instrument using two special probes with different nozzle face diameters. Flatness
: Measuring flatness is achieved by moving the workpiece flat on a fixed plane with an air nozzle. This is a fast, convenient, simple and accurate way to measure flatness.
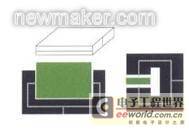
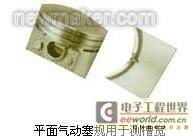
Groove width: The thin probe can easily measure the size of the groove. The pneumatic measuring instrument can not only measure the width of the groove, but also measure the parallelism of the two sides of the measured groove.
Fit tolerance: For two workpieces with tolerance requirements, Edmond's electronic column displays the size value of the hole, the size value of the shaft, and the gap value between the hole and the shaft.
|
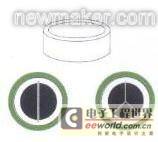
the inside diameter of |
|
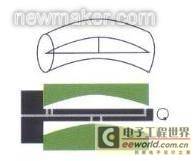
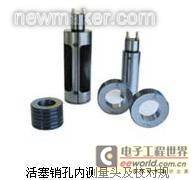
Pneumatic gauges are often used to measure the size or shape of the inner diameter of a workpiece hole. Two-nozzle pneumatic probe - has two opposing nozzle holes, often used to measure the inner diameter of a hole. |
|
|
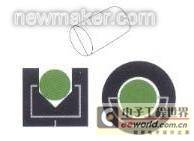
Outside diameter |
|
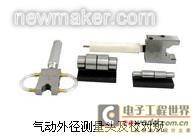
Pneumatic gauges are often used to measure the size or shape of the outer diameter of a workpiece. Two-nozzle pneumatic plug gauges are mainly used to measure outer diameters. The measuring tool with multiple nozzles evenly distributed on a circular surface can complete the measurement of the average value for the user. |
|
|
Height Thickness |
|
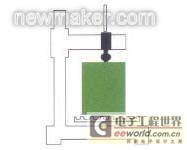
Pneumatic gauges are also quick and effective for measuring height thickness. |
|
|
Slot width |
|
The thin-sheet probe can conveniently measure the size of the groove. The pneumatic measuring instrument can not only measure the width of the groove, but also measure the parallelism of the two sides of the measured groove. |
|
|
Concentricity |
|
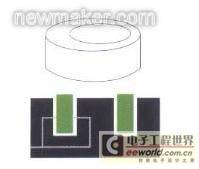
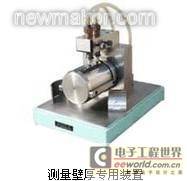
Pneumatic measuring instruments can indirectly determine coaxiality by measuring the wall thickness difference. |
|
|
Straightness |
|
Another common use of pneumatic measuring instruments is to dynamically measure the straightness or curvature of holes. In such measurements, a special pneumatic probe can quickly and easily measure the straightness of the inner hole of the measured part. |
|
|
Verticality |
|
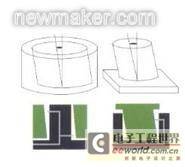
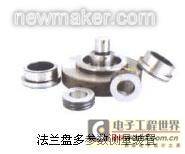
To measure the verticality of a workpiece, such as measuring the verticality of a hole relative to a surface, a pneumatic probe with a "Z"-shaped nozzle can be moved in the hole to measure the change in verticality based on the change in back pressure. The flange inner diameter, port outer diameter, coaxiality, etc. can be measured simultaneously according to user needs. |
|
|
Taper |
|
The change in taper can be easily measured by a pneumatic measuring instrument using a special probe with two different nozzle face diameters. |
|
Adjustment of pneumatic measuring instruments
Pneumatic measuring instruments need to frequently adjust the magnification and zero position during use. After a period of use, various faults will occur, which requires troubleshooting to restore the original function and performance. The adjustment of various performance indicators of the measuring instrument is mostly carried out during the production process, and the premise is that all parts of the measuring instrument have not been used, the air source meets the requirements, and the calibration tools are standard.
1. Adjustment of indication error
The main factors affecting the indication error of the float-type pneumatic measuring instrument are the tapered glass tube, working pressure, leakage and probe.
The shape of the inner cavity of the tapered glass tube is the key factor in determining the size of the indication error of the measuring instrument. Especially for the tapered glass tube processed by the grinding process, the error of the inner cavity shape is generally larger.
When leaking the indication error of the pneumatic measuring instrument, the base magnification of the measuring instrument is adjusted between the upper and lower reference points, and the measurement gap value corresponding to the two reference points is given by the micro-motion table or different gauge blocks. If there is air leakage at the joints and connecting pipes from the upper end of the tapered glass tube to the probe, the measurement gap value will actually increase, causing the indication error of the measuring instrument to change. Therefore, it is necessary to carefully check whether the tapered glass tube is installed obliquely, whether the glass tube gland is not pressed tightly, whether there is a gap at the joint press, and whether the distribution chamber is leaking due to loose tissue.
Due to frequent zeroing, the end face of the standard axial probe will be worn, which will reduce the nozzle radius and cause the error in the middle of the effective indication range of the measuring instrument to be positive. At this time, it should be corrected.
2. Adjustment of the maximum magnification
For the magnification valve, pay attention to whether there are chips and other dirt in the screw hole of the magnification screw in the distribution chamber that have not been cleaned, whether the screw hole has not been processed to the depth, whether the end face of the screw hole is not perpendicular to the axis of the screw hole, or the flatness is poor, and the threaded part of the magnification screw is too long.
3. Adjustment of the maximum measurement gap
If the maximum magnification of the measuring instrument can meet the requirements, the main factors affecting the maximum measurement gap of the measuring instrument are air leakage inside the measuring instrument and at the connecting pipe and joints.
4. Adjustment of intake pressure characteristics
The main factor affecting the intake pressure characteristics of the meter is the pressure characteristics of the regulator.
5. Adjustment of float stability
The indication stability of the pneumatic meter is the stability of the float. The factors affecting the stability of the float mainly include the shape of the float, irregular air leakage in the gas circuit, and vortexes generated at the throttle valves of the gas circuit. The float's large outer circle is not round, there are burrs and bumps on the outer circle surface, and the outer shape and inner cavity are not coaxial, which will cause the float to rotate, swing and tilt. At this time, the float should be replaced.
6. Adjustment of multi-tube indication changes
The factors affecting the multi-tube indication changes are the tight fit of the zero valve sleeve and the excessive stiffness of the zero spring.
7. Adjustment of indication stability
The factors affecting the indication stability of the meter mainly include air leakage in the connecting pipeline and the connection, the outer diameter of the sealing ring on the multiplier screw is too small, the thread fit is too loose, and the thread of the zero screw is too loose. The air source is too dirty, and the filter in the gas circuit has not been cleaned for a long time, resulting in too much oil and moisture in the air flowing through the meter. When conducting a long-term indication stability experiment, the oil and dirt in the air accumulate on the baffle (i.e., the pad or meter) under the nozzle. The longer the time, the more the accumulation, which is equivalent to the gradual reduction of the measuring gap, and the indication of the meter will inevitably change.
8. Adjustment of indication variation and response time.
The indication variation of the meter is out of tolerance, mainly depending on whether the voltage stabilizer is normal and whether there is any large dirt entering the voltage stabilizer or the meter.
The following matters should also be noted during use:
Purifying the air source is the most important condition to ensure the normal use of the pneumatic meter, so a larger capacity filter device should be added before the filter of the meter, and the water should be drained, replaced, and cleaned frequently;
in addition, it should be noted that the air source pressure should not be lower than 3kgf/cm2; avoid placing the meter in direct sunlight and in places with large temperature changes; pay attention to timely replacement of plastic pipes; after closing the air inlet valve and reopening it, use standard parts to recalibrate the zero position and magnification; select the meter within the effective indication range of the meter; the measuring gap of the probe shall not be greater than the maximum measuring gap. (end)
Previous article:Several factors affecting the measurement of coating thickness gauge
Next article:Detecting Glitches and Other Transient RF Signals with a Real-Time Spectrum Analyzer
- Keysight Technologies Helps Samsung Electronics Successfully Validate FiRa® 2.0 Safe Distance Measurement Test Case
- From probes to power supplies, Tektronix is leading the way in comprehensive innovation in power electronics testing
- Seizing the Opportunities in the Chinese Application Market: NI's Challenges and Answers
- Tektronix Launches Breakthrough Power Measurement Tools to Accelerate Innovation as Global Electrification Accelerates
- Not all oscilloscopes are created equal: Why ADCs and low noise floor matter
- Enable TekHSI high-speed interface function to accelerate the remote transmission of waveform data
- How to measure the quality of soft start thyristor
- How to use a multimeter to judge whether a soft starter is good or bad
- What are the advantages and disadvantages of non-contact temperature sensors?
- Innolux's intelligent steer-by-wire solution makes cars smarter and safer
- 8051 MCU - Parity Check
- How to efficiently balance the sensitivity of tactile sensing interfaces
- What should I do if the servo motor shakes? What causes the servo motor to shake quickly?
- 【Brushless Motor】Analysis of three-phase BLDC motor and sharing of two popular development boards
- Midea Industrial Technology's subsidiaries Clou Electronics and Hekang New Energy jointly appeared at the Munich Battery Energy Storage Exhibition and Solar Energy Exhibition
- Guoxin Sichen | Application of ferroelectric memory PB85RS2MC in power battery management, with a capacity of 2M
- Analysis of common faults of frequency converter
- In a head-on competition with Qualcomm, what kind of cockpit products has Intel come up with?
- Dalian Rongke's all-vanadium liquid flow battery energy storage equipment industrialization project has entered the sprint stage before production
- Allegro MicroSystems Introduces Advanced Magnetic and Inductive Position Sensing Solutions at Electronica 2024
- Car key in the left hand, liveness detection radar in the right hand, UWB is imperative for cars!
- After a decade of rapid development, domestic CIS has entered the market
- Aegis Dagger Battery + Thor EM-i Super Hybrid, Geely New Energy has thrown out two "king bombs"
- A brief discussion on functional safety - fault, error, and failure
- In the smart car 2.0 cycle, these core industry chains are facing major opportunities!
- The United States and Japan are developing new batteries. CATL faces challenges? How should China's new energy battery industry respond?
- Murata launches high-precision 6-axis inertial sensor for automobiles
- Ford patents pre-charge alarm to help save costs and respond to emergencies
- New real-time microcontroller system from Texas Instruments enables smarter processing in automotive and industrial applications
- [Synopsys IP Resources] How 5G affects chip design
- Microcontroller Basics
- [Application Sharing] Power Amplifier Based on Flexible Piezoelectric Ultrasonic Transducer Testing and Experimental Application
- What does DIN VDE V 0884-11:2017-01 mean for digital isolator certification?
- Self-built houses in rural areas VS buying houses in cities
- Answer questions to win prizes: Azure Sphere IoT solution quiz ranking competition, how long can you dominate the screen?
- VKD224B touch chip debugging notes
- FAQ_How to evaluate the antenna performance of the development board
- 【Download】New version GD32F10x: Based on Arm Cortex-M3 32-bit MCU
- Wireless mouse production



 Chip Manufacturing: A Practical Tutorial on Semiconductor Process Technology (Sixth Edition)
 A very good time series toolbox


 京公网安备 11010802033920号